Category Archives: Sewing Machine

Applique Success

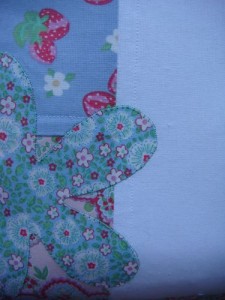
I’ve started stitching around the edges of my applique cushion. This one …

I’m using bobbin fill on the bottom and rayon embroidery thread on the top (Robison Anton Rayon). I’m using a blanket stitch (stitch number Mode 2 35 if you have a Janome 6600p – I’m also using the F2 foot, which makes it much easier to see what you are doing) with a length and width of 1.5mm.

I’m surprised by how easily this is all coming together – it’s not perfect by any means, but easier than I expected.

Leave a Comment

Filed under Applique, Sewing Machine

Sampler is Finished

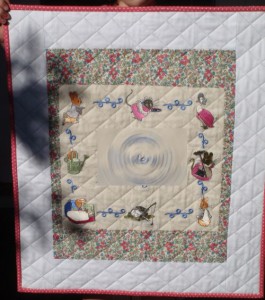
I finished this sampler – I’ve blurred the name and birth date in the middle.

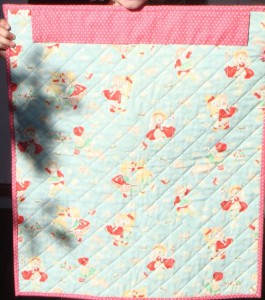
Here is the back …

I used 2.5 inch strips to bind the quilt. This worked much better for me than 2 inch strips.

I quilted in straight lines using a stitch length of 3.5mm – the normal setting for my machine is 2.2mm – I think the longer length does make for nicer quilting.

Leave a Comment

Filed under Machine Embroidery, Quilting, Sewing Machine

Quilting Again


I’m feeling re-motivated and keen to get back into crafting. I’ve started quilting this sampler. I’m quilting in straight lines on the diagonal (using my Accufeed foot – it is fabulous) and purple masking tape (it’s low tac) to mark the lines.

1 Comment

Filed under Machine Embroidery, Quilting, Sewing Machine

My New Toy

I bought the 1/4 inch acufeed foot for my sewing machine. Once I worked out that I needed to change the needle position it all went well. Instead of being at 3.5 it needs to be at 5.5.

Leave a Comment

Filed under Sewing Machine

Continuous Binding

I like continuous binding, but I always have trouble with the last join. This time I watched a DVD tutorial by Brenda Smith. I watched a bit, did what she did, watched the next bit etc. I achieved perfect results – I didn’t even end up with a pinch in the binding because I put the join in slightly the wrong spot. In fact she made it so clear I’m not sure why I had trouble in the past.

My copy of the DVD came from the latest issue of the Homespun magazine (I know it sounds like I work for this magazine, but I hardly ever buy it. I’ve bought the last two issues for the DVDs).

I’ve still got to hand sew the binding to the back of the quilt, so I shall an image tomorrow of the (hopefully) finished quilt.

I used my acufeed foot to attach the binding, but it was hard to get 0.25 inch seam. I either need to use my patchwork foot or purchase a quarter inch acufeed foot.

Leave a Comment

Filed under Quilting, Sewing Machine

I have a new sewing machine!

I’ve been wanting this sewing machine for a while (and the Mothers Day sale made it possible). My MC9000 (Janome) while good was a bit old, the touch screen was a bit dodgy and it didn’t have the built in thread cutter (which I’ve come to really like on my 1600p) and it was quite tricky to manoeuvre a quilt around it.

This new one is fabulous – I bought the table as well. The table is fabulous; it makes such a difference to be working at the right height.

The acufeed system is marvellous; my in the ditch quilting is almost perfect. I’ve also done a bit of free motion quilting and that is great too (all errors due to me rather than the machine).

I’m really tempted to try applique on this machine – there seems to be several stitches that might work.  I bought two cushion patterns from Hot Possum (one a dinosaur and one a fairy) to test it out.

Leave a Comment

Filed under Sewing Machine

Pony in Progress

ponystitching

 I’ve been working on the pony design all day (off and on). My machine informed me it would take 46 minutes, but that’s just sewing time and once you take into account trimming the applique fabric and changing the thread it takes much longer even if you’re doing nothing else – whereas I’ve had a few other jobs to do today as well.

Leave a Comment

Filed under Applique, Machine Embroidery, Sewing Machine

Tutorial – Machine Embroidery Multi Hooping Part 2 and 3

The tutorial (on how to create large machine embroideries) is finished you can find it here.

Leave a Comment

Filed under Machine Embroidery, Sewing Machine, Software

Machine Embroidery – Multi Hooping – I Did It!

I have an embroidery sewing machine. It’s largest hoop is 200mm by 140mm (not including the gigahoop). I’ve always wanted to embroider a larger area and finally I did. I used Embird (to create the design and print the template) and a clothsetter (to place the fabric accurately in the hoop).

I made a birth sampler for Miss A (I removed her name and birth date from the above image for obvious reasons). It measures 35cm by 35cm and took 7 hoopings.

I will write a tutorial about my method (because I searched and couldn’t find anything particularly helpful).

1 Comment

Filed under Machine Embroidery, Sewing Machine, Software

Making Letters for Applique Using An Embroidery Machine – Part 2

In Part 1 I digitised my letters. Now I’m going to stitch them out and attach them to a towel.

I like use calico (Quilters muslin) as a stabiliser for my T-Shirt and Towel appliques. It seems to work really well for me.

AppliqueHoopSm

As you can see, I hoop the fabric as well. For some other projects I don’t hoop the fabric just the stabiliser, but I’ll save that for another day.

I then stitch out the letters…

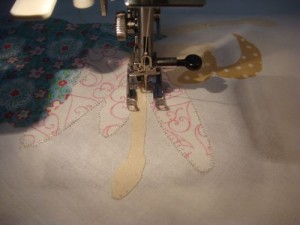
Stitching Applique

I use Robinson-Anton Rayon Embroidery thread and Janome bobbin fill (I resent having to buy the Janome Bobbin fill, but it does seem to work the best). It’s also a good idea to change the sewing machine needle every 8 hours or so.

I then cut out the letters. I usually do this while watching T.V.

I’m now ready to attach them to a towel.

I spray the back of the letters with a basting spray – currently I’m using Craft Smart Applique and Embroidery Positioning Spray (I also use this to attach fabric to the stabiliser when I don’t want to hoop the fabric). I bought it from Spotlight.

I use low tac masking tape on the towel to mark a straight line and I place the middle letter of the name in the centre of the towel – the spray will make them stick (just temporarily).

Applique Towel

I then attach the letter. I use an ‘invisible’ thread in the needle and a bobbin thread in a colour to match the towel (in this case white). I use Sulky Invisible Thread, which you can get from here.

I sew the remaining letters using the same method – working outwards from the centre. For example, with a name like Karen I would start with the r, then the a, then the e, then the K and finally the n.

I would show you the finished product, but this one is a gift and I don’t want anyone to see it before them, but here is one I prepared earlier…

EleriTowel

Leave a Comment

Filed under Machine Embroidery, Sewing Machine