

As promised, here is the start of the tutorial.
As promised, here is the start of the tutorial.
Filed under Machine Embroidery, Software
I have an embroidery sewing machine. It’s largest hoop is 200mm by 140mm (not including the gigahoop). I’ve always wanted to embroider a larger area and finally I did. I used Embird (to create the design and print the template) and a clothsetter (to place the fabric accurately in the hoop).

I made a birth sampler for Miss A (I removed her name and birth date from the above image for obvious reasons). It measures 35cm by 35cm and took 7 hoopings.
I will write a tutorial about my method (because I searched and couldn’t find anything particularly helpful).
Filed under Machine Embroidery, Sewing Machine, Software
I subscribe to the Inspirations magazine and in issue 52 they had this blackwork butterfly by Tanja Berlin.

I like it and I would like to try to replicate it with machine embroidery (my hand embroidery is hopeless …).
Here’s part of a wing that I’ve been working on in Thred.

It still needs a bit of work and it will be quite a drawn out process (not as long as doing it by hand though)
And another wing …

I’ve also changed the angle of the fill slightly.
Filed under Machine Embroidery, Magazines, Software
As I’m planning on making a few more of these towels as gifts, I thought I would describe the process.
I like to use a sans-serif font. Less fiddly when you come to sew the letters on! My favourite at the moment is Verdana.
I use a combination of Paint, Scansoft PC (an old Janome Package) and Embird to create my letters.
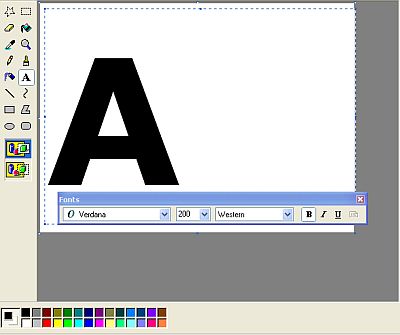
In Paint I set the image size to 400 by 380 (that’s the size scansoft can take). I then use the Text tool (set to Verdana, Bold, size 200) to create one letter.
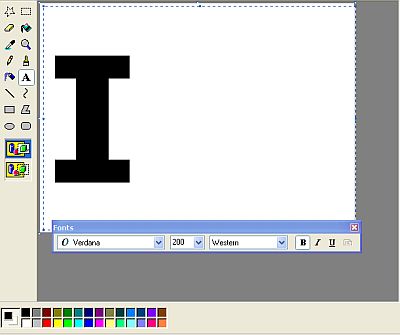
Of course, you can use whatever size and font you like. I then save the letter as a monochrome bitmap – it’s one of the options on the Save As panel. Once again, I do this because Scansoft will only take monochrome images (it’s very old software, but cheap!).
I then open Scansoft and import my letter.
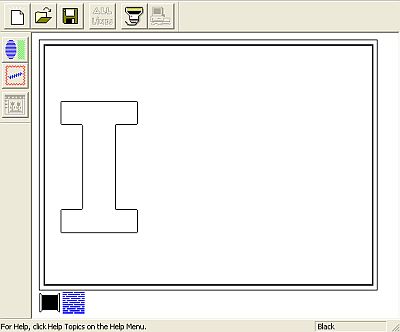
The software traces all of the lines.
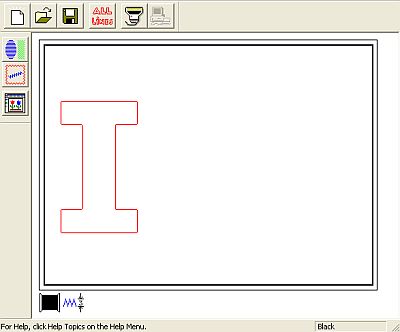
I select the Line tool (the cursor is pointing to it in the image below)
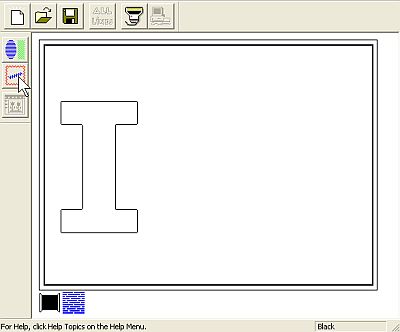
I then select (on the panel that pops up) the width of the satin stitching.

At this stage I don’t worry too much about the colour – you can use whatever colour you like when you sewing it out.
I want to embroider all of the lines, so I select the All Lines button (see image below).
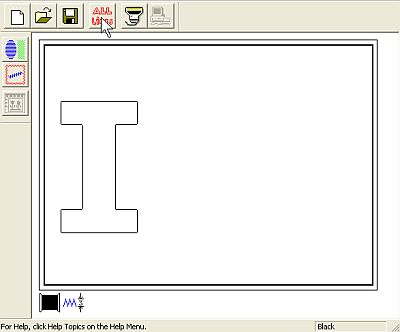
The image is highlighted.
I then select the Register button to make the embroidery.

The following panel appears
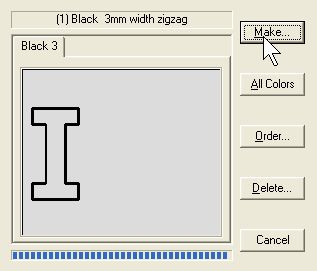
I select the Make button (the Cursor is point to it in the above image). The following panel appears …
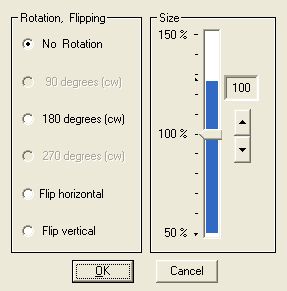
I select OK and the letter is created.
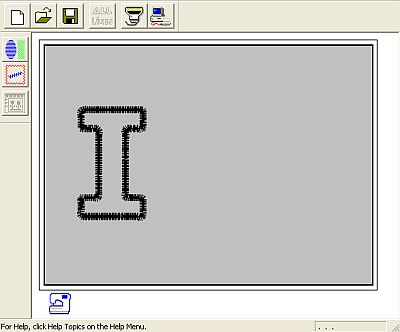
I then save the letter in .sew format.
As I have a Janome MC350e, I need to convert from the .sew format to .jef format. I do this in Embird. See this tutorial for information about converting files in Embird.
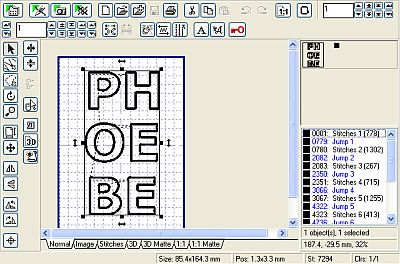
I also like to use Embird to combine a few letters into one hoop (see image below for an example). I’ll create a whole new post later about combining designs in Embird.
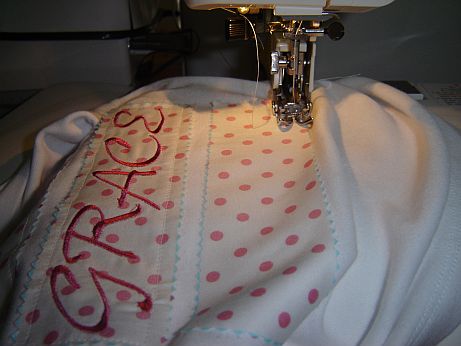
I then save the designs onto my USB stick and stitch them out.
Next post: stitching out the letters and attaching them to the object.
Filed under Machine Embroidery, Software
Happy Easter everyone!
I’ve been busy making stock for my market stall. The sewing is almost finished, but I haven’t even started on the admin stuff.
I’ve bought PC Quilt software. I’m hoping to use it to help with my quilt design. I can do individual blocks, but I wanted something to show me different layouts. Plus I thought it would be useful with my documentation – because I do plan to write tutorials for the quilts I make.
I haven’t had much time to play – but I’ve discovered I can scan in my fabric, rotate quilt blocks and print foundation blocks. I will post more when I’ve had more time to play.
Filed under Software