As I’m planning on making a few more of these towels as gifts, I thought I would describe the process.
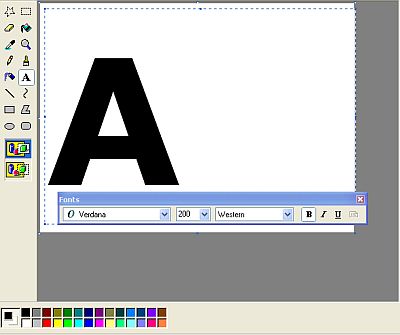
I like to use a sans-serif font. Less fiddly when you come to sew the letters on! My favourite at the moment is Verdana.
I use a combination of Paint, Scansoft PC (an old Janome Package) and Embird to create my letters.
In Paint I set the image size to 400 by 380 (that’s the size scansoft can take). I then use the Text tool (set to Verdana, Bold, size 200) to create one letter.
Of course, you can use whatever size and font you like. I then save the letter as a monochrome bitmap – it’s one of the options on the Save As panel. Once again, I do this because Scansoft will only take monochrome images (it’s very old software, but cheap!).
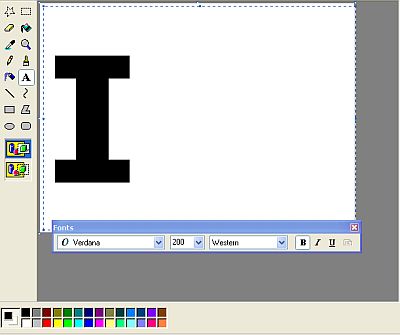
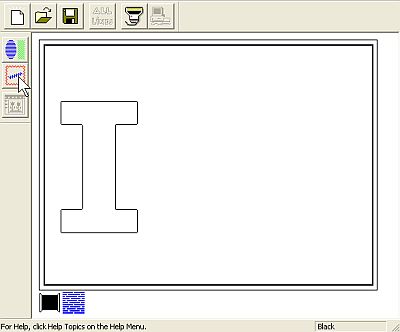
I then open Scansoft and import my letter.
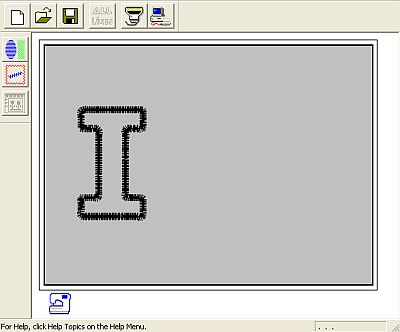
The software traces all of the lines.
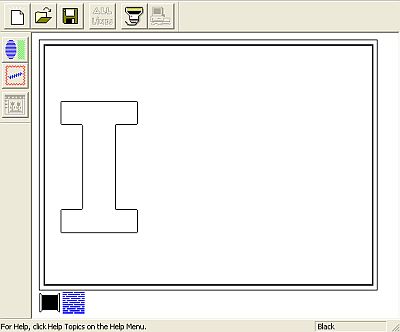
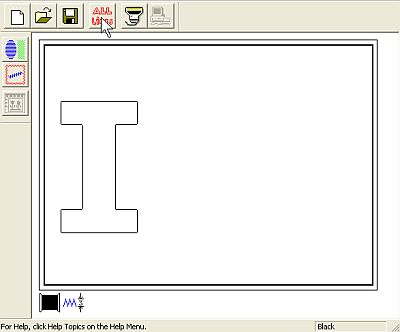
I select the Line tool (the cursor is pointing to it in the image below)
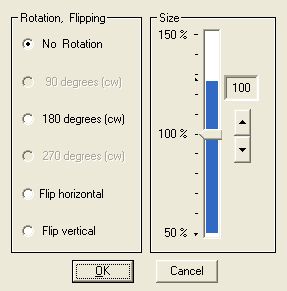
I then select (on the panel that pops up) the width of the satin stitching.

At this stage I don’t worry too much about the colour – you can use whatever colour you like when you sewing it out.
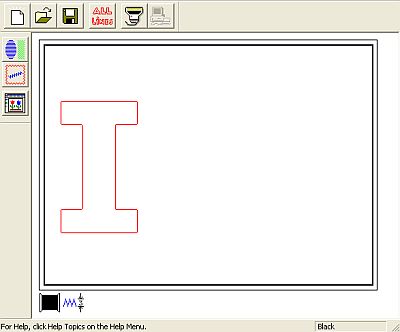
I want to embroider all of the lines, so I select the All Lines button (see image below).
The image is highlighted.
I then select the Register button to make the embroidery.

The following panel appears
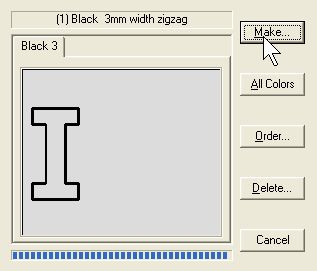
I select the Make button (the Cursor is point to it in the above image). The following panel appears …
I select OK and the letter is created.
I then save the letter in .sew format.
As I have a Janome MC350e, I need to convert from the .sew format to .jef format. I do this in Embird. See this tutorial for information about converting files in Embird.
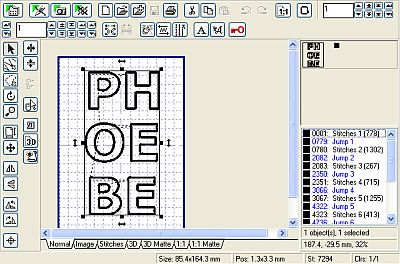
I also like to use Embird to combine a few letters into one hoop (see image below for an example). I’ll create a whole new post later about combining designs in Embird.
I then save the designs onto my USB stick and stitch them out.
Next post: stitching out the letters and attaching them to the object.
Pingback: SewWitty » Making Letters for Applique Using An Embroidery Machine - Part 2