
So I’ve changed the look. I’m not sure about this particular shade of green, but I’m happy with everything else. I might do a bit of experimenting with different shades of green over the next few days.
It’s so hot – 38 degrees (100)!
So I’ve changed the look. I’m not sure about this particular shade of green, but I’m happy with everything else. I might do a bit of experimenting with different shades of green over the next few days.
It’s so hot – 38 degrees (100)!
Filed under miscellaneous
My Inspirations magazine arrived today.
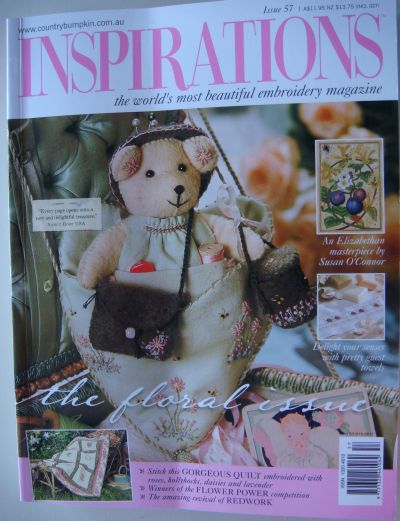
This is one of my favourite magazines – I have yet to make anything from it, but the pictures are beautiful.

and
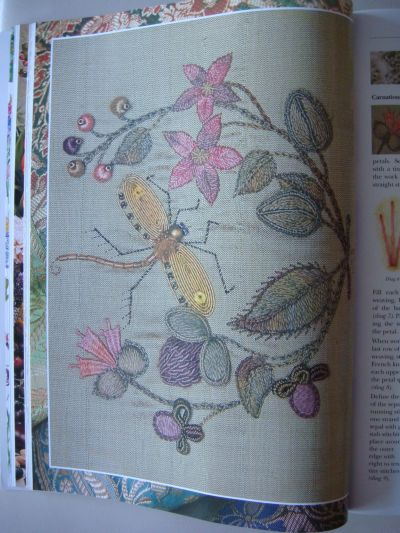
I doubt I’ll ever make anything like these (and certainly not by hand), but they’re beautiful and certainly inspiring.
Filed under Magazines

This is one of my Turning Twenty blocks.
I’ve been quite pleased with this pattern. The cutting has been easy and it’s coming together nicely (although I did mix up some of my A and B blocks today – I realised before I stitched them together so the disaster was averted).
Filed under Quilting
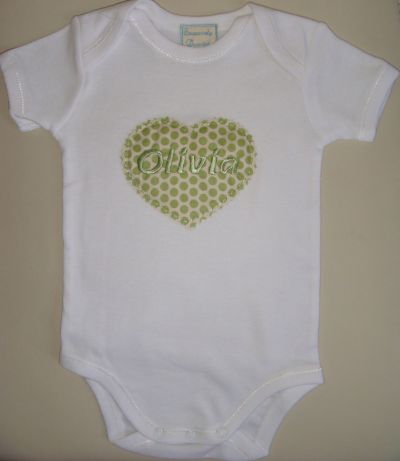
A friend has ordered a bodysuit (onesie) for a friend’s baby. The font is Nadianne from GG Designs. I have a CD with 25 fonts – very useful. I think I should design my own fonts, but that’s quite time consuming and it’s nice to have some fonts I can use when I’m in a hurry.
And here is the final product …
I’ve been having a few problems with the comments. I’m being spammed by some drug thing – very annoying.
Filed under Machine Embroidery
No photos today – we have a new camera that needs a new memory stick, so there is no space for crafty photos at the moment.
I’ve been working on my Turning 20 quilt. I’m using Fresh Cut by Heather Bailey fabric.
So far I have made 16 of the 20 blocks. The quilt is going together very easily – the hardest thing is deciding how to allocate the fabrics to blocks.
Filed under Quilting
Filed under Machine Embroidery

On the weekend I realised that I hadn’t thought of presents for my girls’ teachers. As school finishes on friday, I don’t have much time. I decided to make the bird christmas tree ornament from this book.
Despite my best efforts, I couldn’t get the belly section to join the body section without puckers.
The timing was pretty much spot-on – it took about four hours to make five of them. I think several in the tree would look fabulous, but I’m not sure if I have the motivation to make any more.
Filed under Christmas Decorations, Sewing
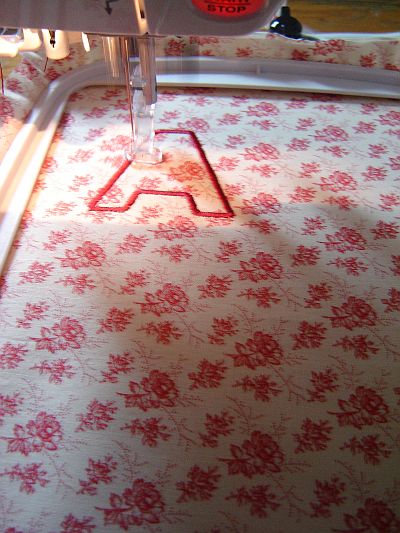
In Part 1Â I digitised my letters. Now I’m going to stitch them out and attach them to a towel.
I like use calico (Quilters muslin) as a stabiliser for my T-Shirt and Towel appliques. It seems to work really well for me.
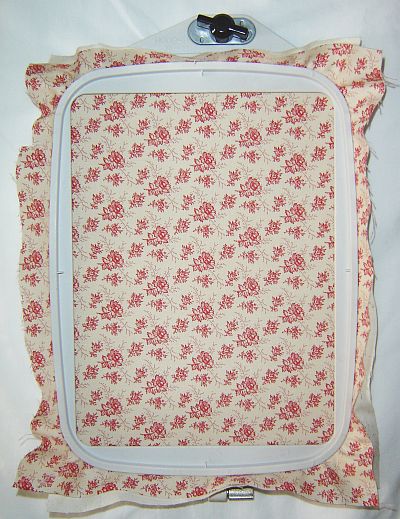
As you can see, I hoop the fabric as well. For some other projects I don’t hoop the fabric just the stabiliser, but I’ll save that for another day.
I then stitch out the letters…
I use Robinson-Anton Rayon Embroidery thread and Janome bobbin fill (I resent having to buy the Janome Bobbin fill, but it does seem to work the best). It’s also a good idea to change the sewing machine needle every 8 hours or so.
I then cut out the letters. I usually do this while watching T.V.
I’m now ready to attach them to a towel.
I spray the back of the letters with a basting spray – currently I’m using Craft Smart Applique and Embroidery Positioning Spray (I also use this to attach fabric to the stabiliser when I don’t want to hoop the fabric). I bought it from Spotlight.
I use low tac masking tape on the towel to mark a straight line and I place the middle letter of the name in the centre of the towel – the spray will make them stick (just temporarily).
I then attach the letter. I use an ‘invisible’ thread in the needle and a bobbin thread in a colour to match the towel (in this case white). I use Sulky Invisible Thread, which you can get from here.
I sew the remaining letters using the same method – working outwards from the centre. For example, with a name like Karen I would start with the r, then the a, then the e, then the K and finally the n.
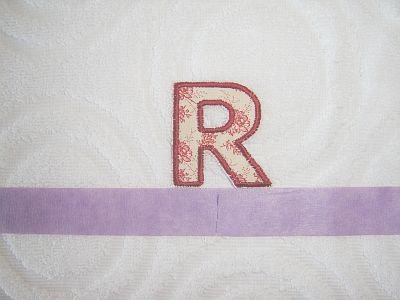
I would show you the finished product, but this one is a gift and I don’t want anyone to see it before them, but here is one I prepared earlier…

Filed under Machine Embroidery, Sewing Machine
As I’m planning on making a few more of these towels as gifts, I thought I would describe the process.
I like to use a sans-serif font. Less fiddly when you come to sew the letters on! My favourite at the moment is Verdana.
I use a combination of Paint, Scansoft PC (an old Janome Package) and Embird to create my letters.
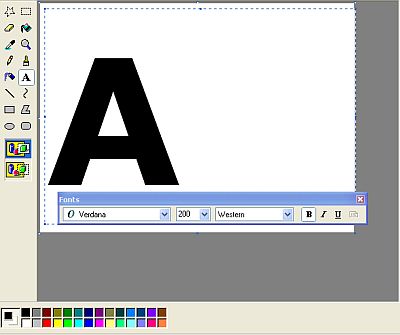
In Paint I set the image size to 400 by 380 (that’s the size scansoft can take). I then use the Text tool (set to Verdana, Bold, size 200) to create one letter.
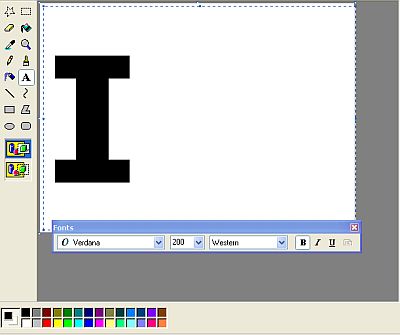
Of course, you can use whatever size and font you like. I then save the letter as a monochrome bitmap – it’s one of the options on the Save As panel. Once again, I do this because Scansoft will only take monochrome images (it’s very old software, but cheap!).
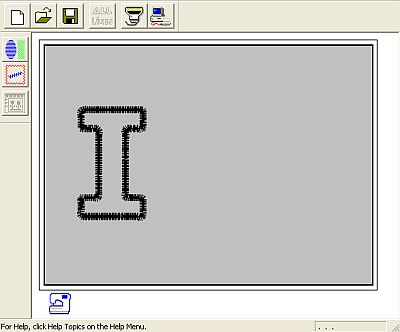
I then open Scansoft and import my letter.
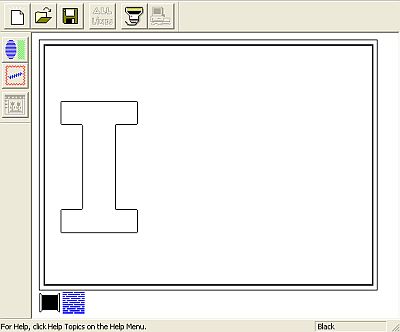
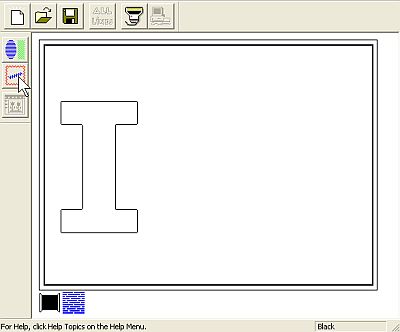
The software traces all of the lines.
I select the Line tool (the cursor is pointing to it in the image below)
I then select (on the panel that pops up) the width of the satin stitching.

At this stage I don’t worry too much about the colour – you can use whatever colour you like when you sewing it out.
I want to embroider all of the lines, so I select the All Lines button (see image below).
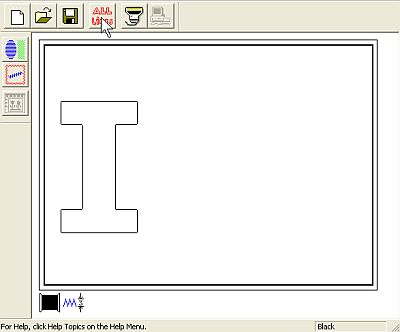
The image is highlighted.
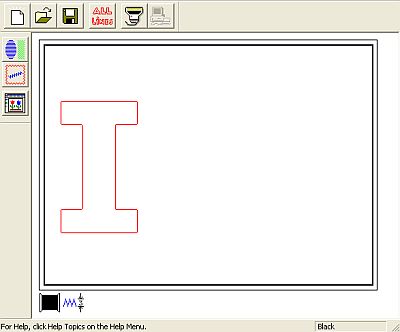
I then select the Register button to make the embroidery.

The following panel appears
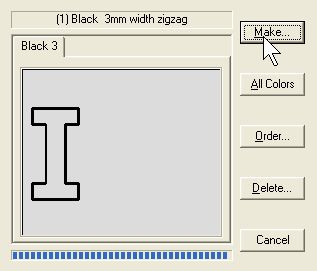
I select the Make button (the Cursor is point to it in the above image). The following panel appears …
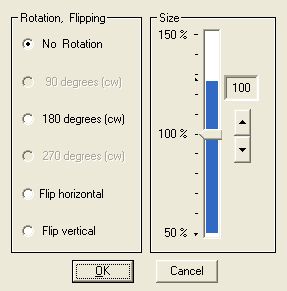
I select OK and the letter is created.
I then save the letter in .sew format.
As I have a Janome MC350e, I need to convert from the .sew format to .jef format. I do this in Embird. See this tutorial for information about converting files in Embird.
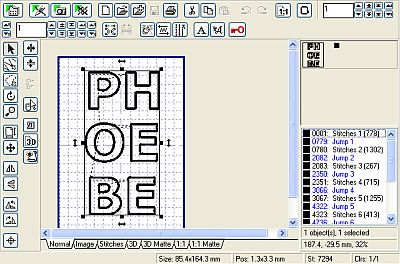
I also like to use Embird to combine a few letters into one hoop (see image below for an example). I’ll create a whole new post later about combining designs in Embird.
I then save the designs onto my USB stick and stitch them out.
Next post: stitching out the letters and attaching them to the object.
Filed under Machine Embroidery, Software
