

I finished another 3D printed piece – this time a frog.
I have used various canvas work stitches (from here) and Cosmo cotton floss. I love this floss, so far I just have solid colours, but I might need to get some variegated thread.
I finished another 3D printed piece – this time a frog.
I have used various canvas work stitches (from here) and Cosmo cotton floss. I love this floss, so far I just have solid colours, but I might need to get some variegated thread.
Filed under 3D Print, Bedazzle, Canvas Work, Cross Stitch, Embroidery, Inspiration


I did a workshop at the Embroiderer’s Guild of WA.
At first I used glue when I wrapped the fabric around the board, but I hated having sticky fingers, so I switched to double sided tape (acid free) – from here.
I used a curved needle to do the sewing, which was a challenge, but I think I improved by the end.
My box is a weird size – a 15cm cube. What was I thinking? So I am not really sure what to use it for. I have heaps of everything left, so I might try to make a more useful-sized box.
Filed under Cardstock, Fabric Stash, Sewing
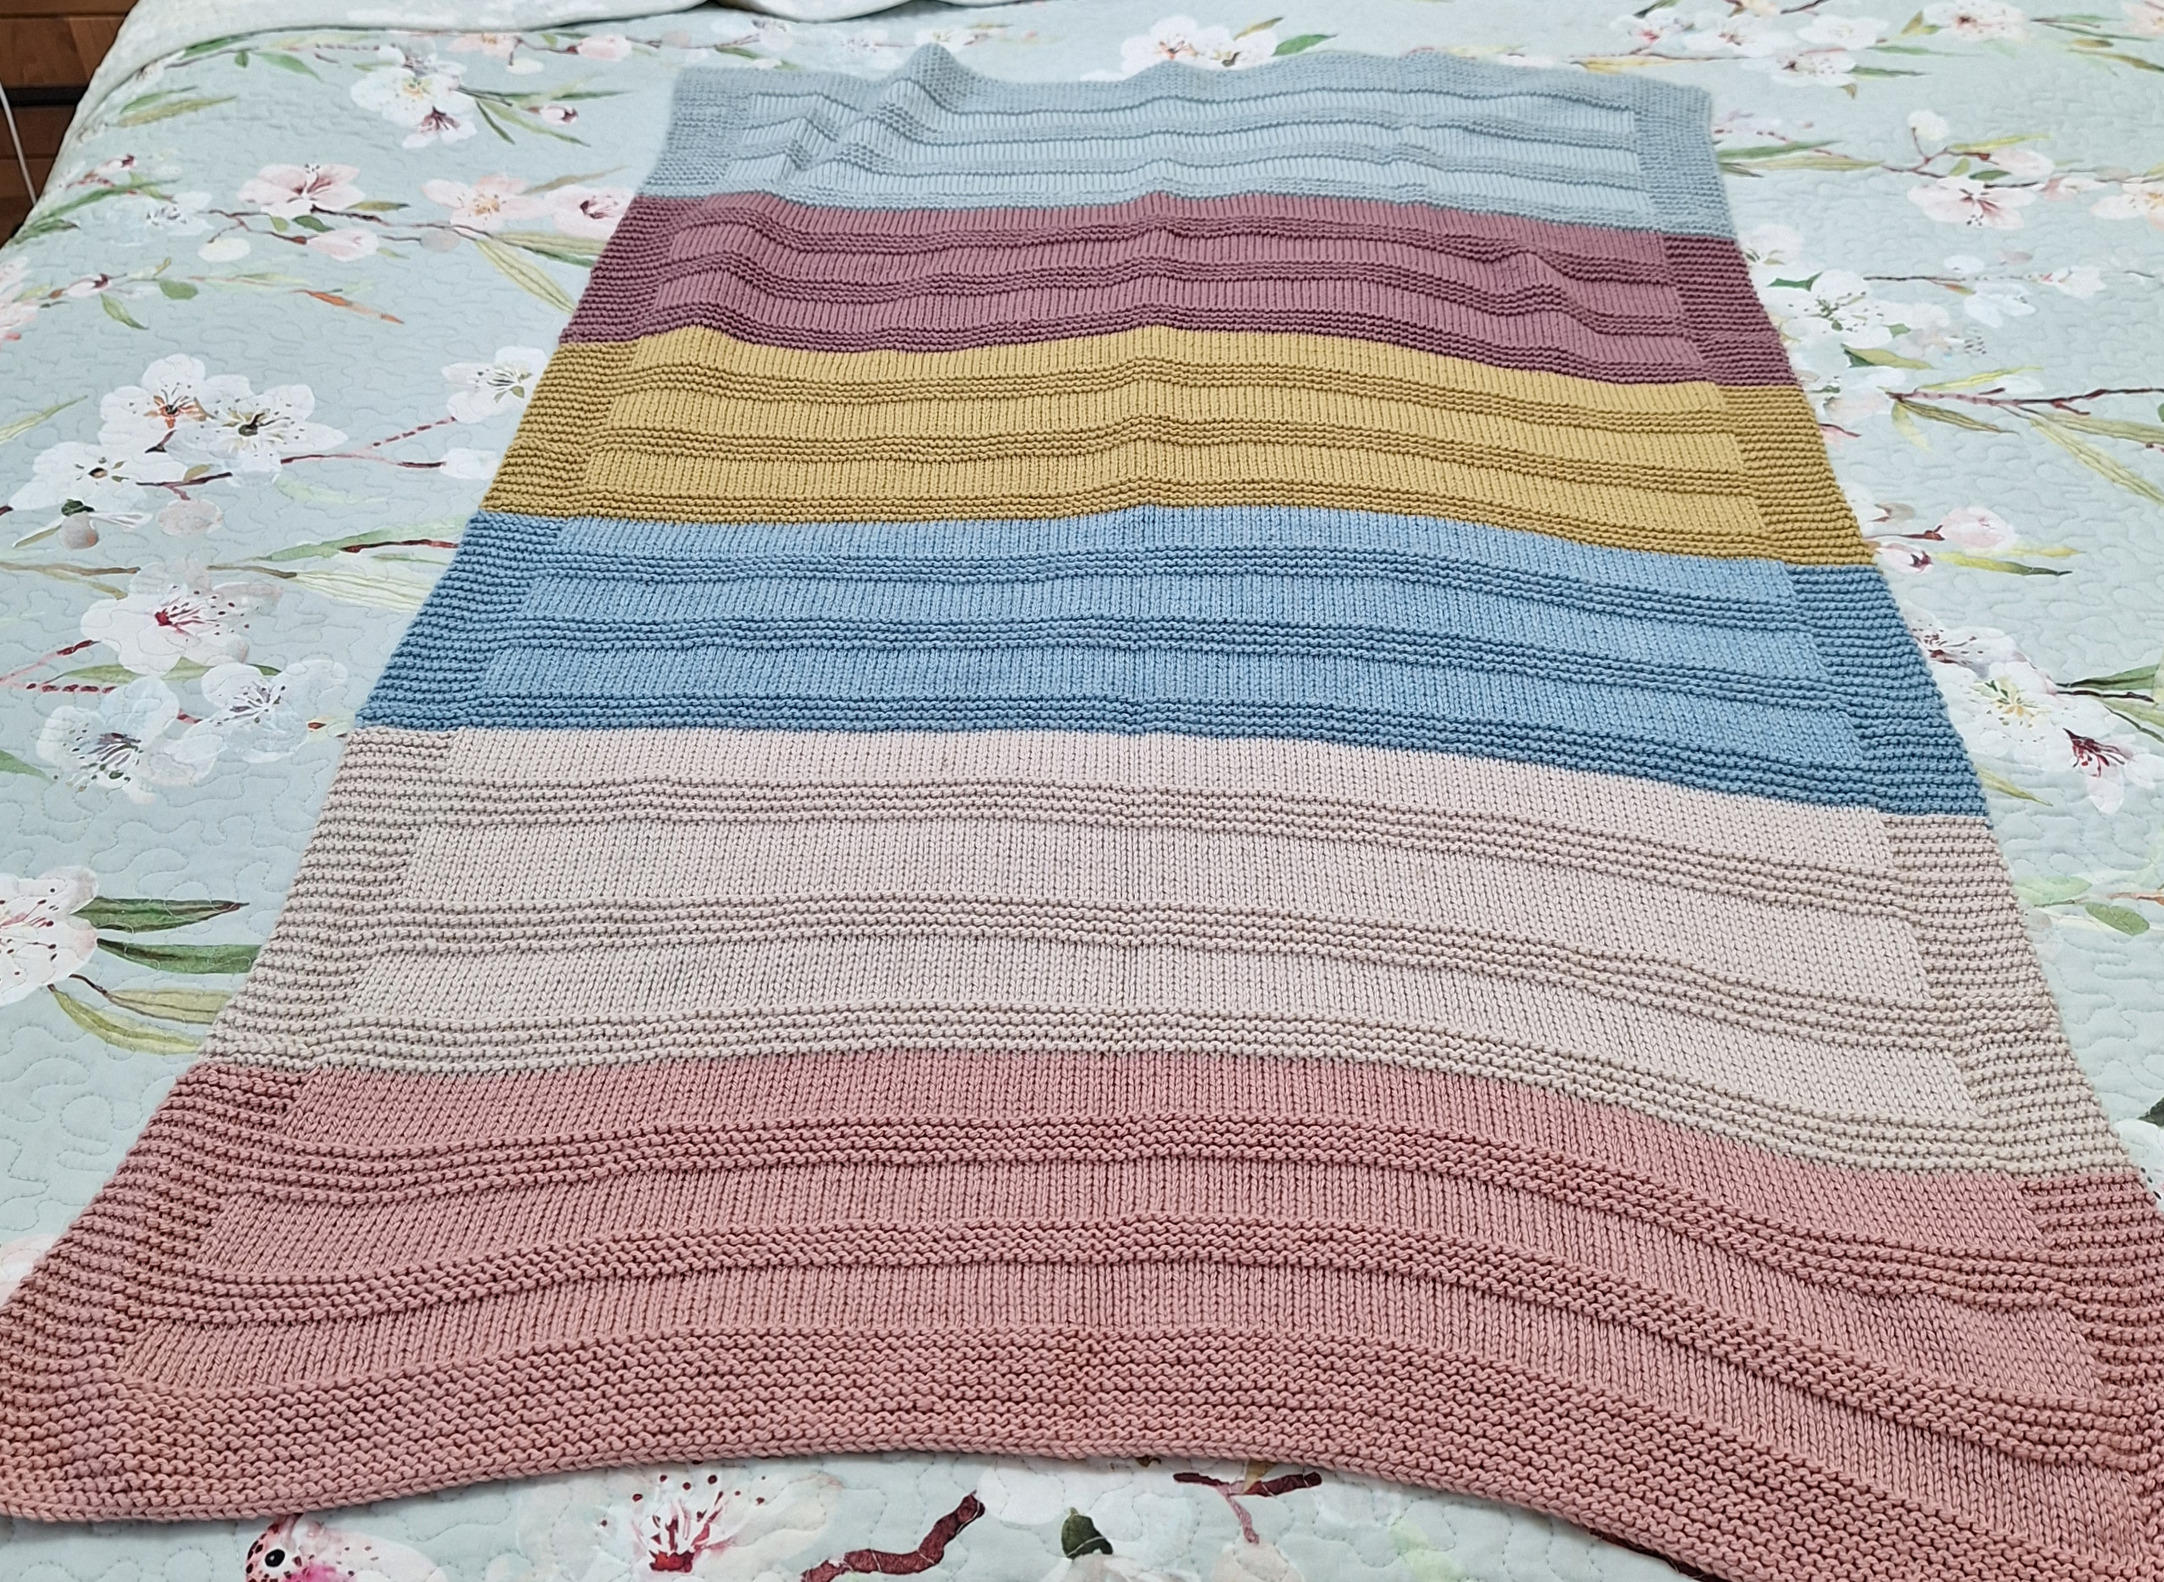
I finished my Hudson baby blanket – it is a gift for someone.
I started it back in November 2025 – that’s not a bad completion time for me!
It is a really easy, fun knit. I bought the kit from Crossways. I am tempted to buy another kit, but I have a few things to finish first.
Filed under Colour Work, Knitting, Knitting - Colour work, Patterns, Purchases, Yarn Stash

I am more of a decorative/craft sewer than a plain sewer (make your own clothes sewing), but I often think about the person who makes my clothes.
Here’s the blurb …
Tens of millions of people sew for necessity or pleasure every day, yet the craft is surprisingly under-appreciated. The Point of the Needle redresses the balance: this is a book that argues for sewing’s place in our lives. It celebrates not only sewing’s recent resurgence but sewists’ creativity, well-being, and community.
Barbara Burman chronicles new voices of people who sew today, by hand or machine, to explore what they sew, what motivates them, what they value, and why they mend things, revealing insights into sewing’s more intimate stories. In our age of superfast fashion with its environmental and social injustices, this eloquent book makes a passionate case for identity, diversity, resilience and memory of what people create for themselves as they stitch and make.
Barbara Burman has done two research projects talking to people about their sewing – One in the late 20th century and one this century. From these studies where hear real people talk about how they learnt to sew, what sewing has meant to them, and the change from sewing to save money to sewing to have a better fit or design.
There are chapters on
Textiles are fundamental to humans, so it is important to think about how the cloth is made, the thread, and the needles. Who does the sewing? What effect is textile manufacture having on the earth and the people in the industry? And I think she should question whether textiles are too cheap?

This T-Shirt from Kmart is $1.50. How is that possible? And it certainly doesn’t encourage people to take care of their clothes or to buy second hand when new is so cheap.
But there are other aspects to sewing as well. The mental health benefits of doing something with your hands, a sense of community and a link to past generations.
If you use a needle (sewing, embroidery, machine sewing, etc.), then I think you will find this book fascinating.
Filed under Book Review, Sewing

I bought new threads from Maison Sajou – metallic ones – I bought boxes 1 and 2. They arrive from France to Australia in less than a week! Things from the other side of the country take longer.
Filed under Bedazzle, Embroidery, Inspiration, Purchases
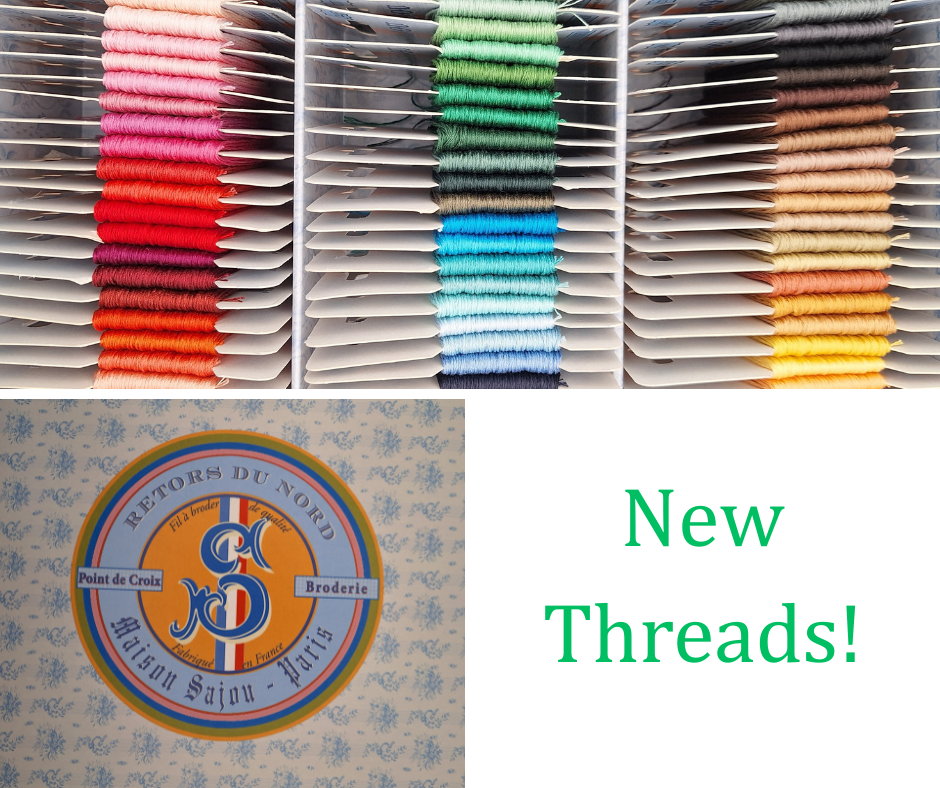
I treated myself to new cotton threads from Maison Sajou.
Filed under Bedazzle, Canvas Work, Cross Stitch, Embroidery, English Paper Piecing, Inspiration, Purchases
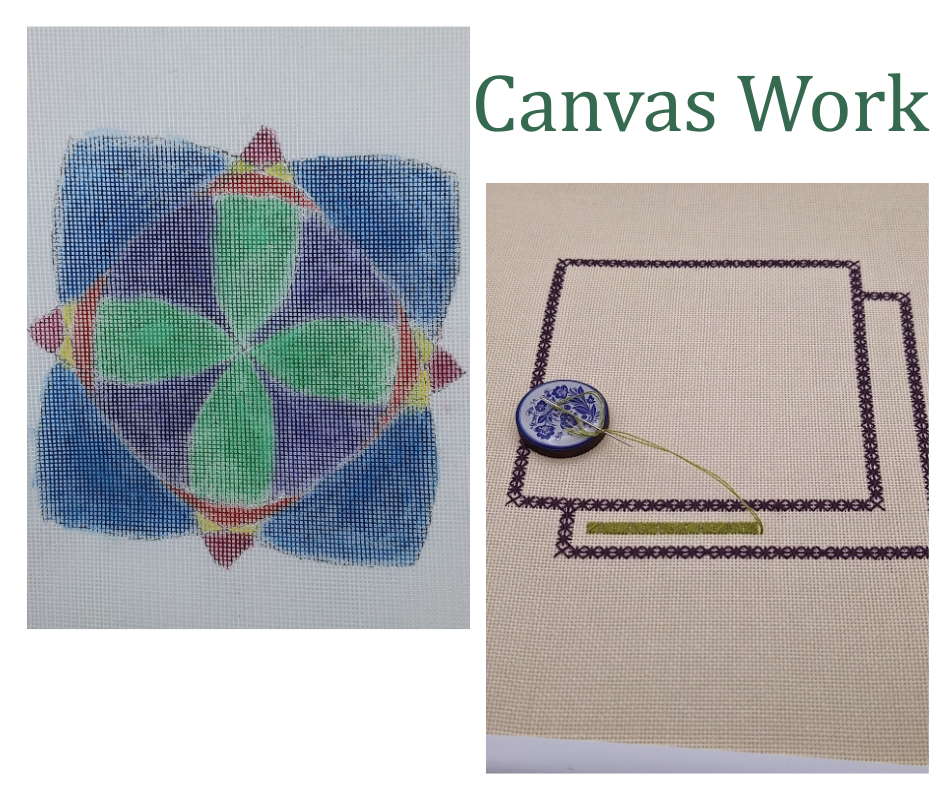
My stitching class at Tresillian has restarted for the year, and I am working on a Canvaswork project (the one on the right in the above photo) designed by Beautiful Stitches. I am using cream congress cloth and Cosmo embroidery floss.
And then I have joined a Canvaswork group that meets once a month and we are attempting something a bit more modern.
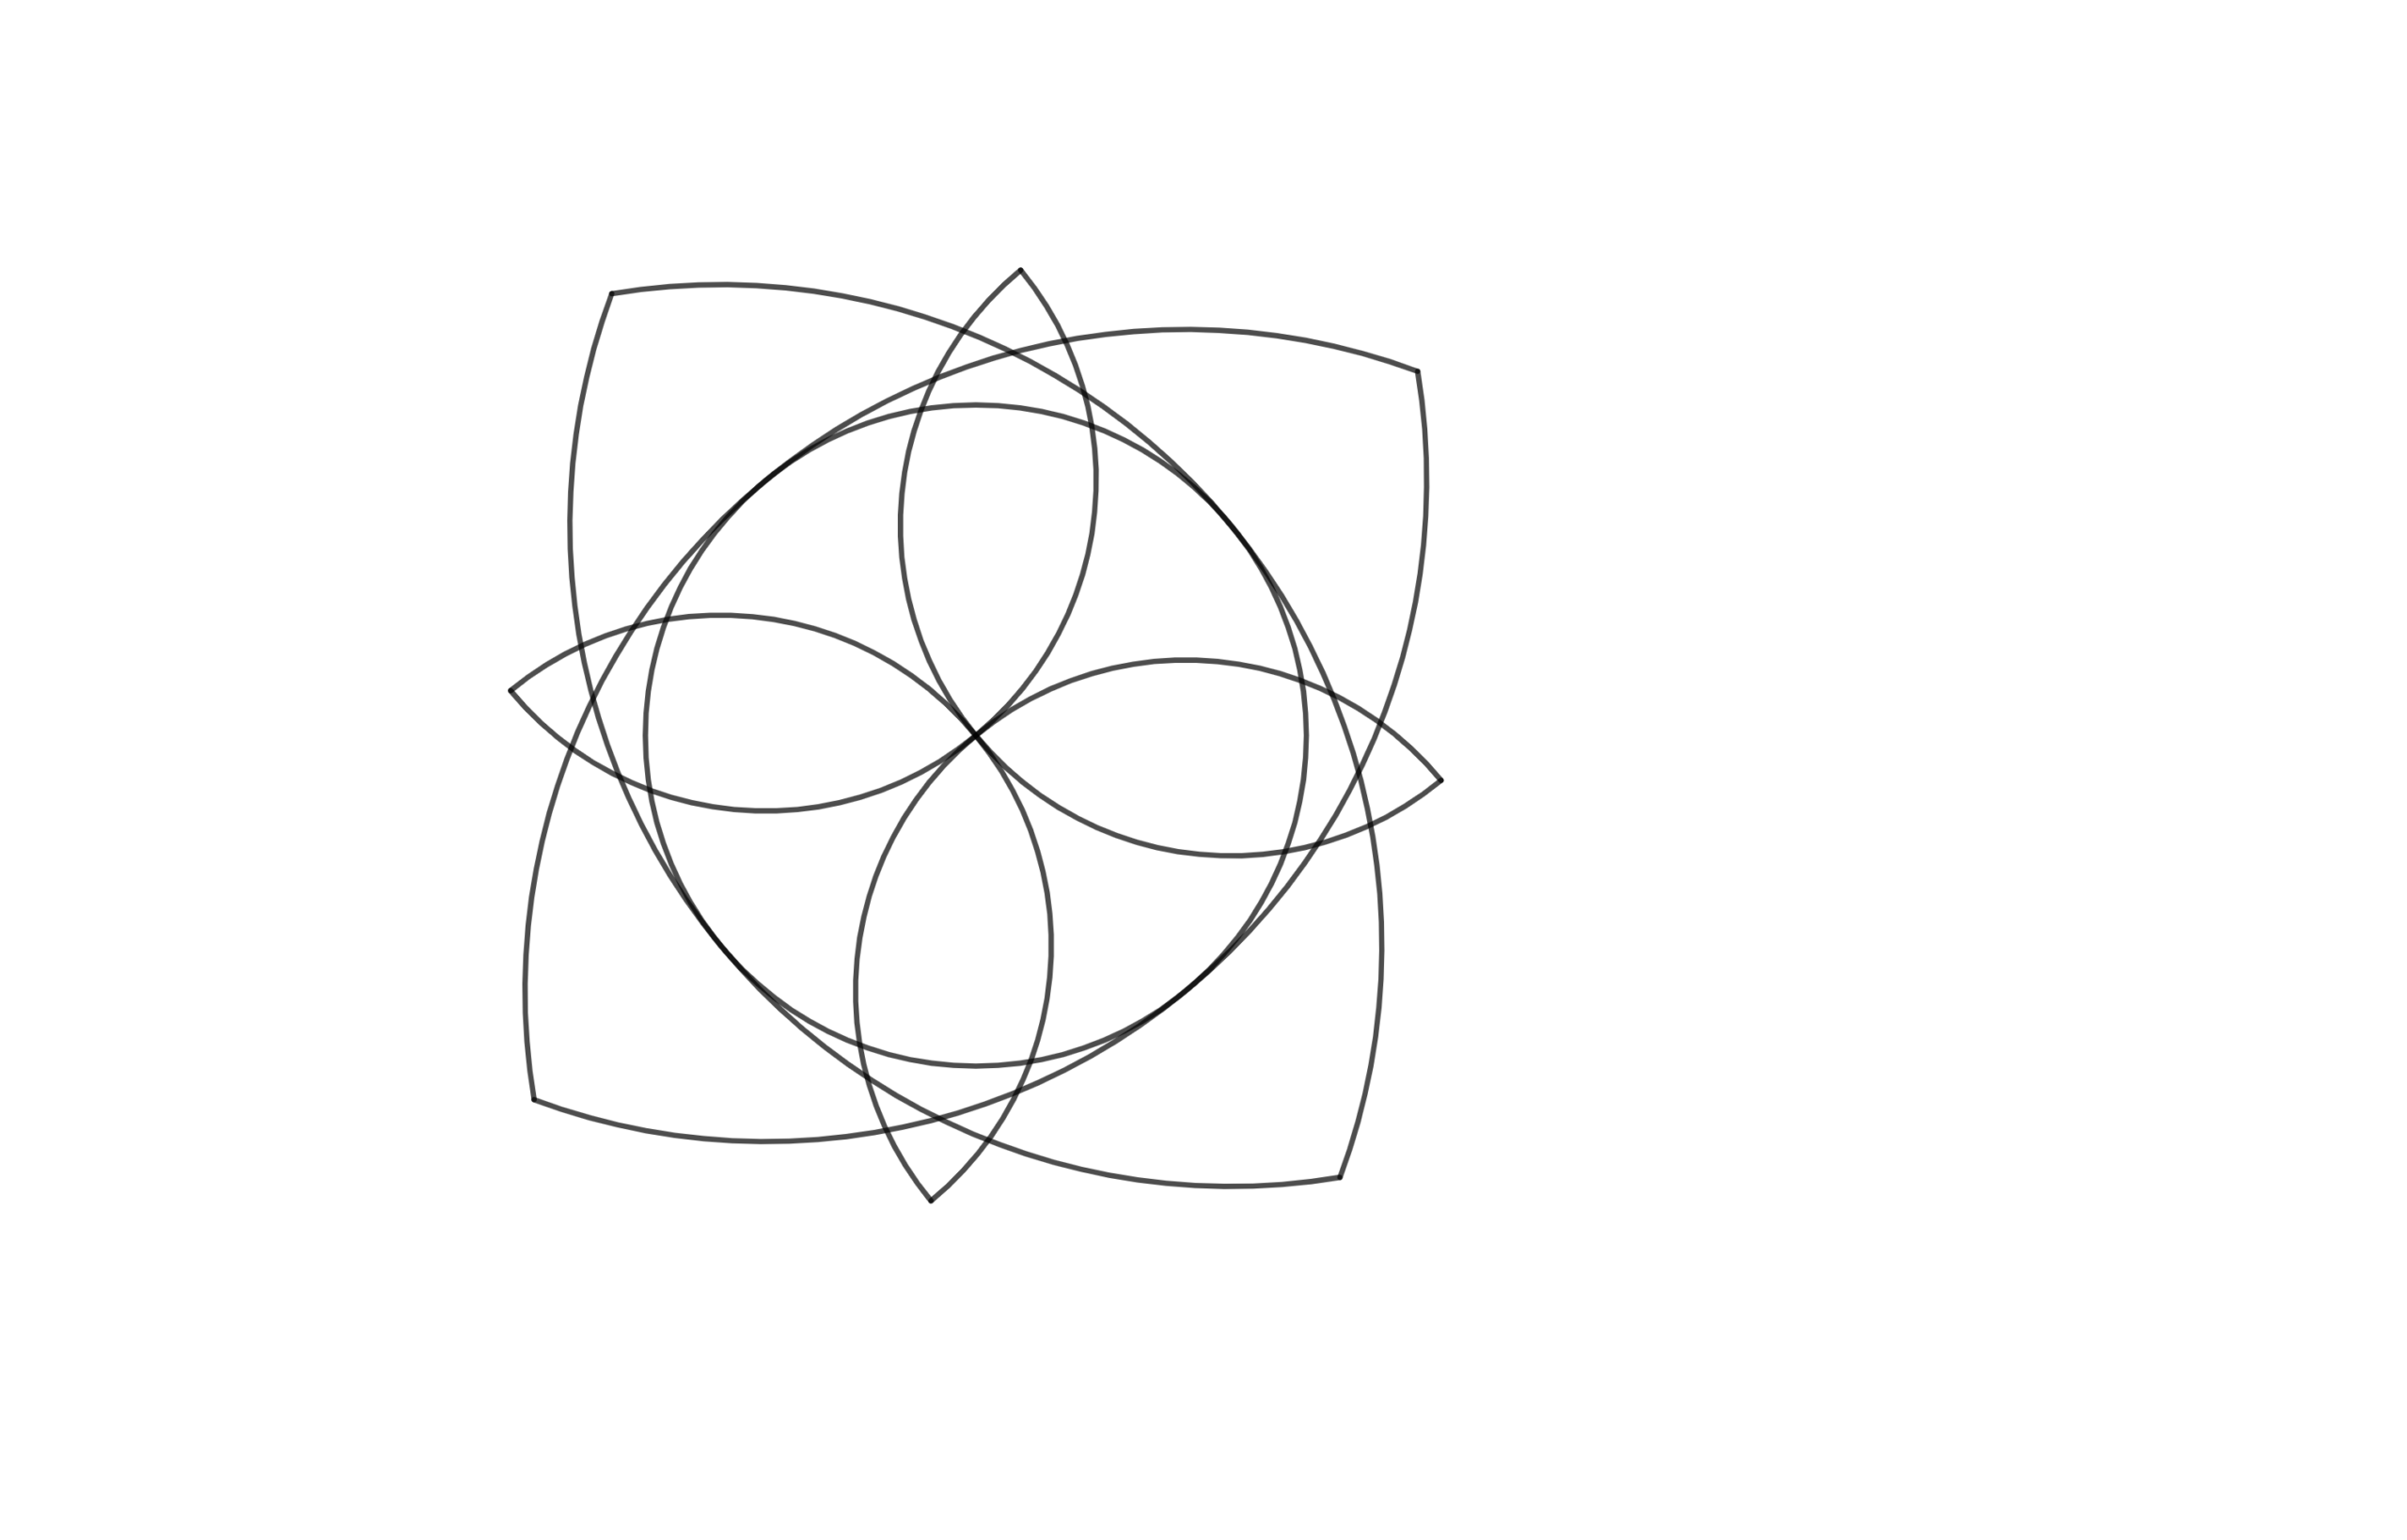
I created a four fold symmetry pattern in Geogebra.
I painted the canvas (18 count) using Inktense pencils, and now I am going to try to add texture using stitches, beads, sequins, etc.
Filed under Canvas Work, Embroidery, Inspiration
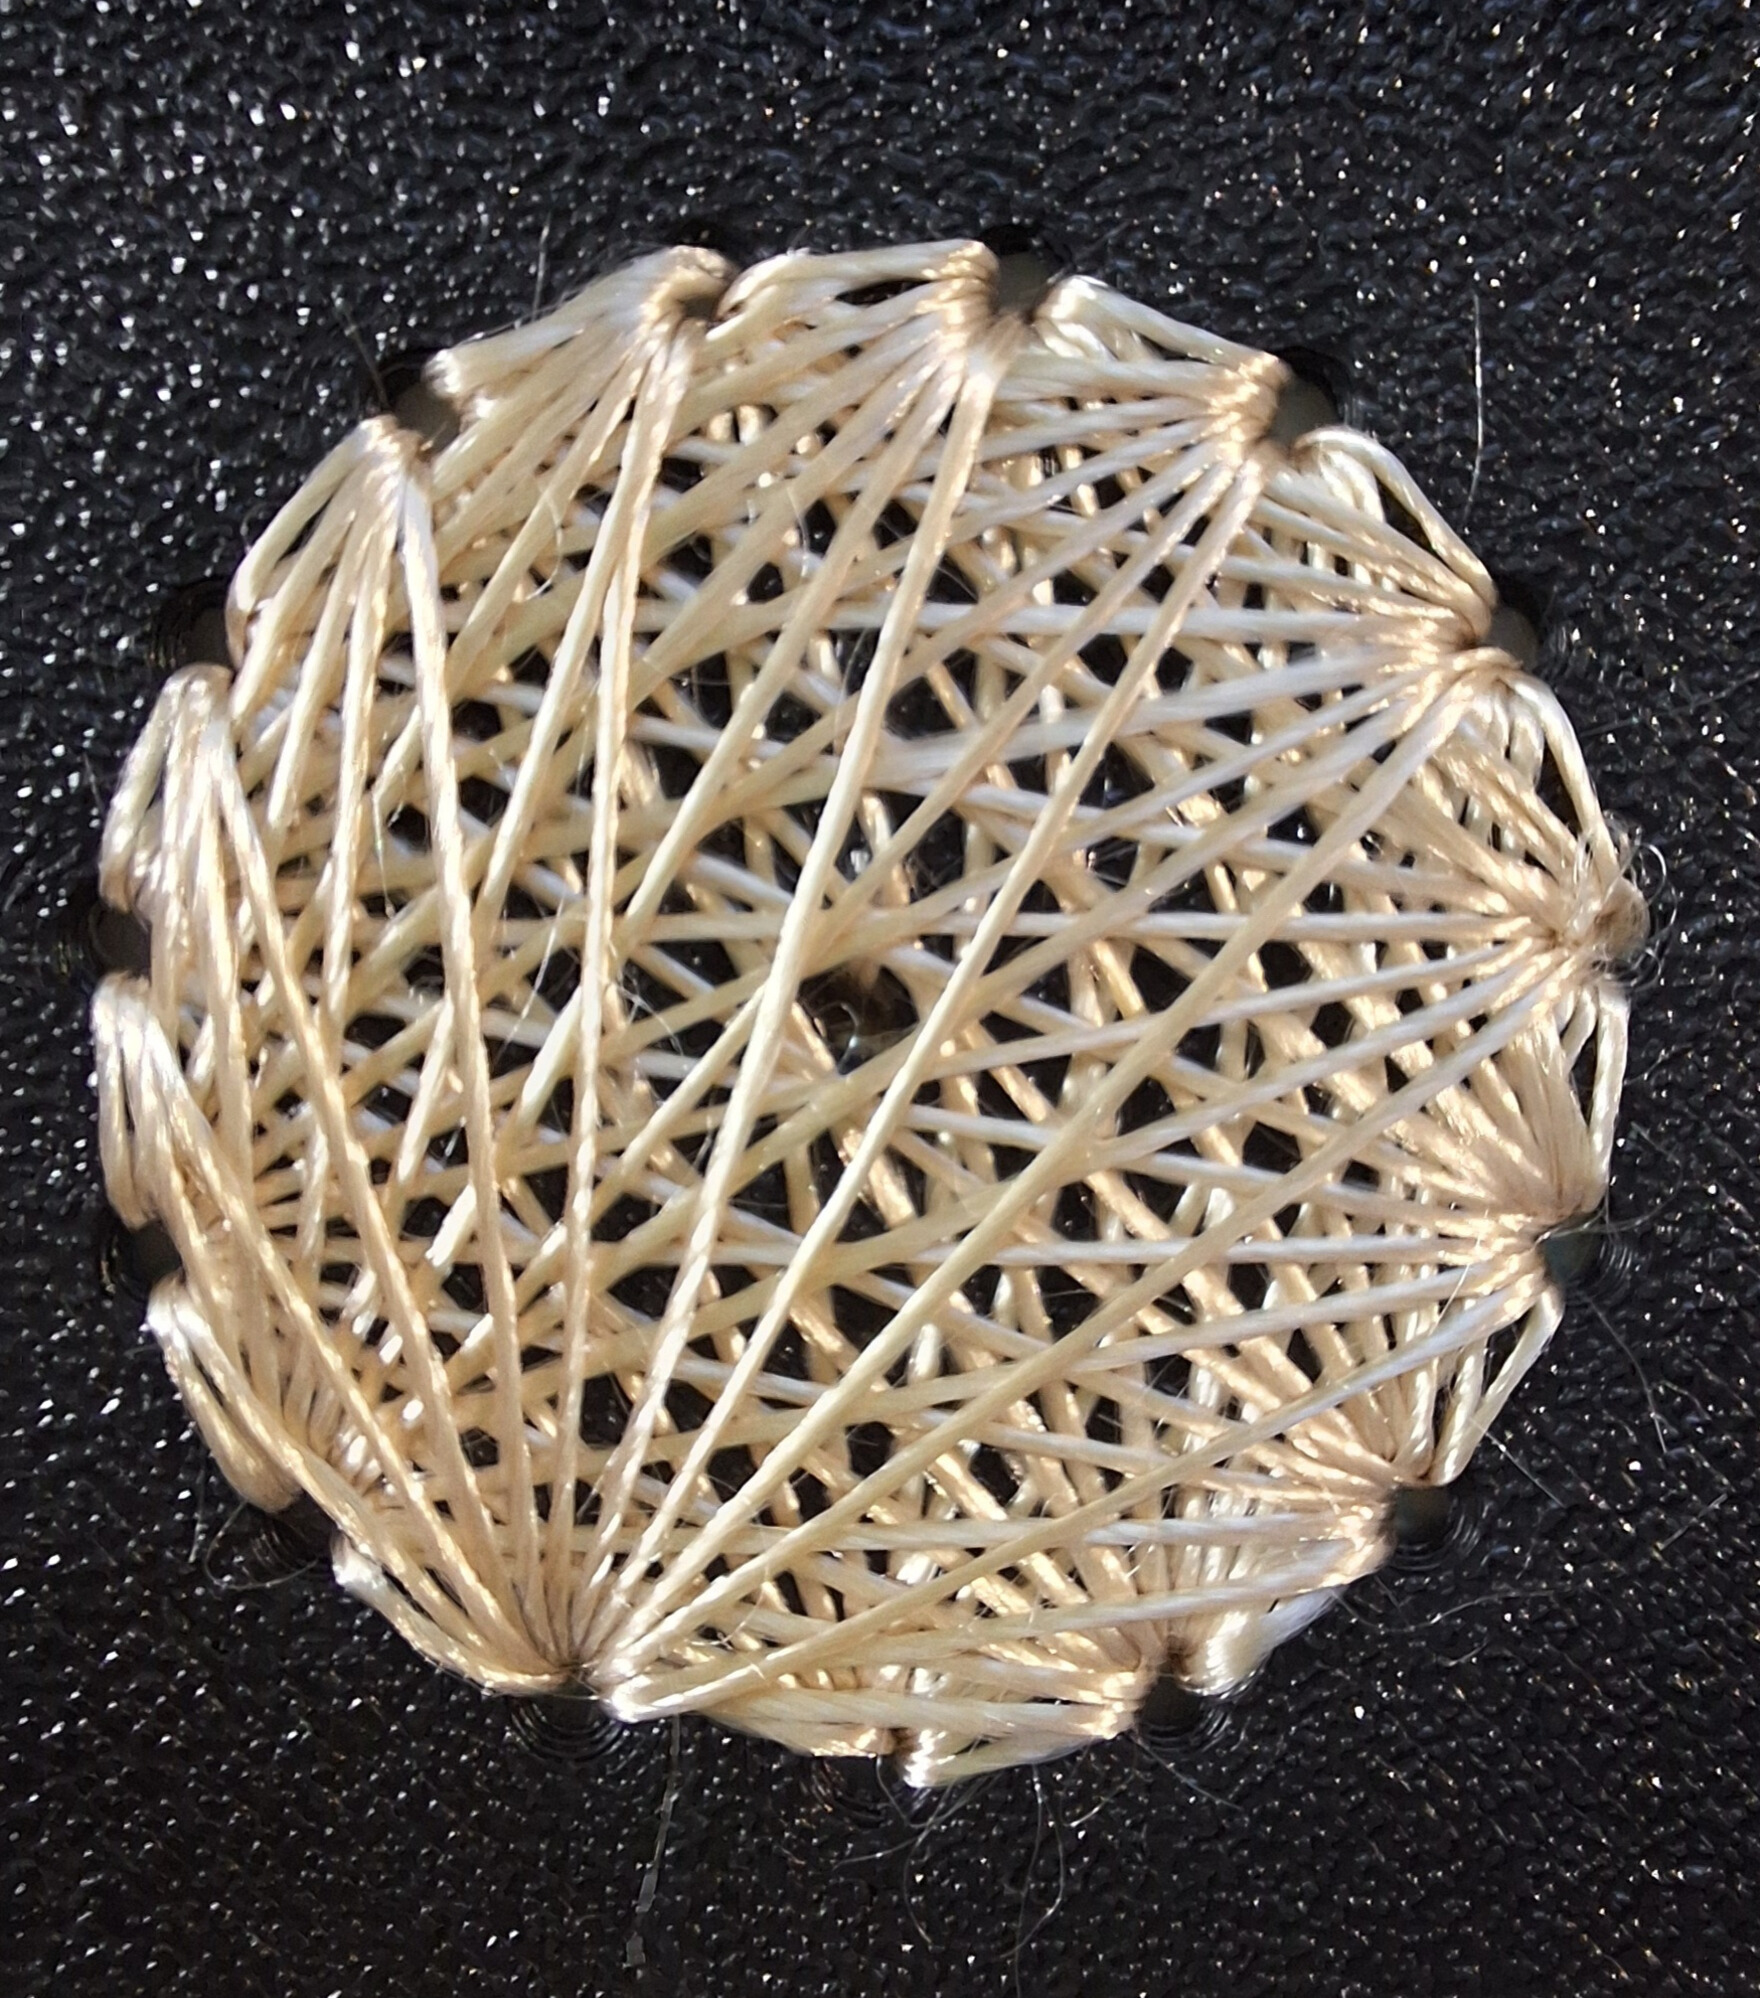
I have been experimenting with 3D printing. This is a circle with 15 equally spaced holes on the circumference, and I made a complete graph (Each hole is joined to every other hole).
I think if the base was circular this would make a lovely brooch.
The thread is a random reel that I bought from the Embroiderer’s Guild backroom.
Filed under 3D Print, Bedazzle, Embroidery, Inspiration
And a side view so you can see the ‘3Dness’ of them
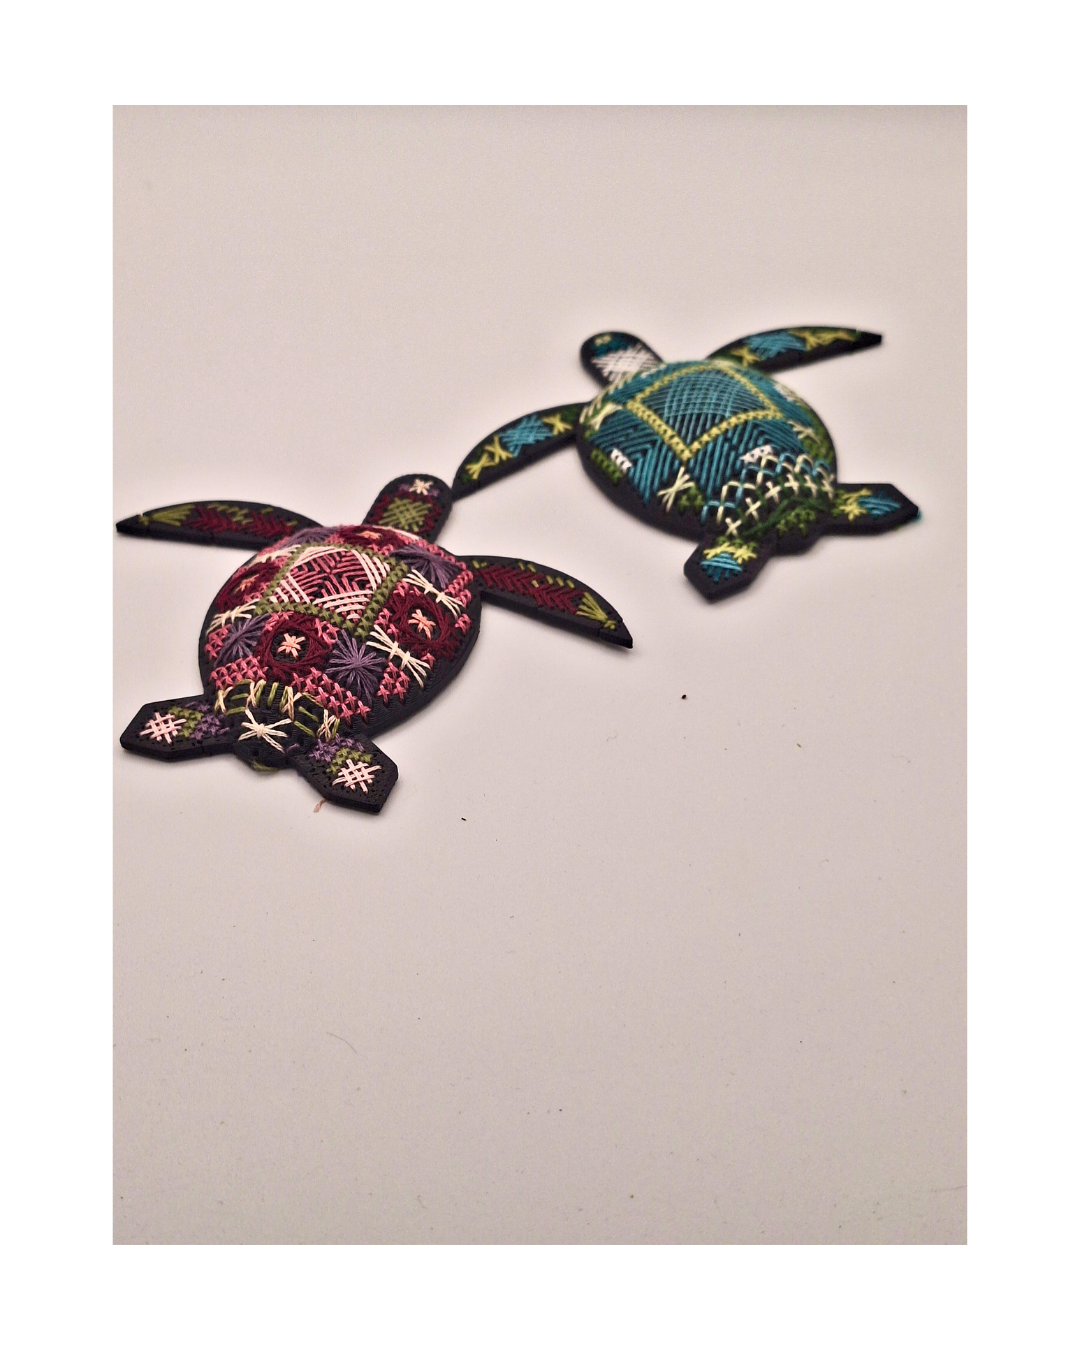
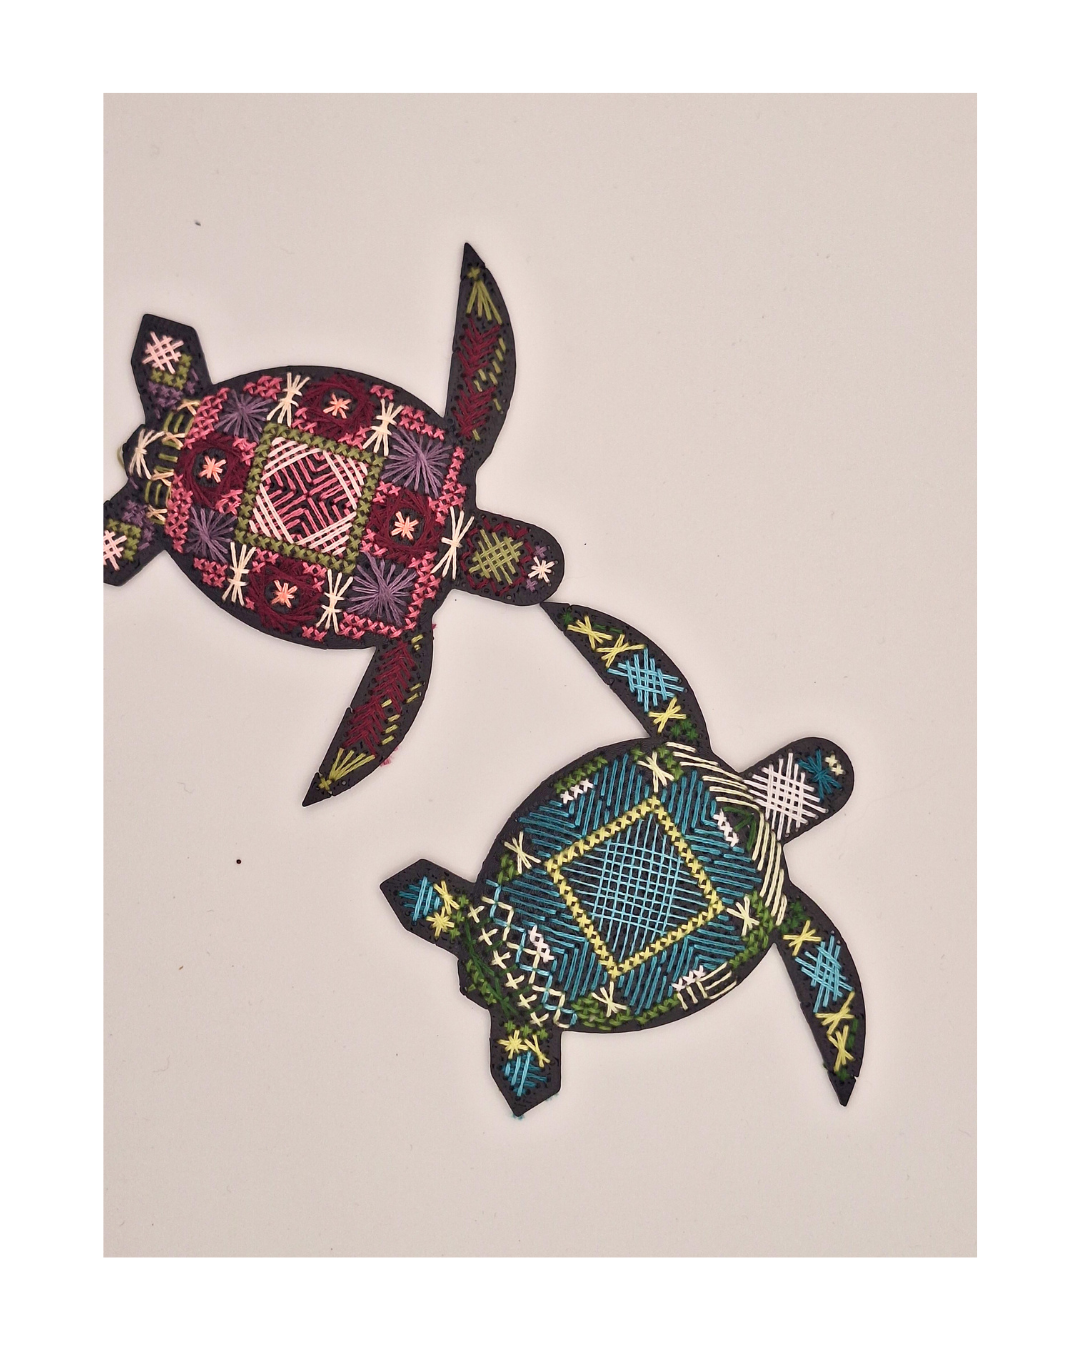
The base is 3D printed.
I used two strands of DMC and a number 9 needle. And I just made it up as I went along.
The back flippers on the girl turtle are white, purple and green in a nod to the suffragettes.
Filed under 3D Print, Canvas Work, Embroidery
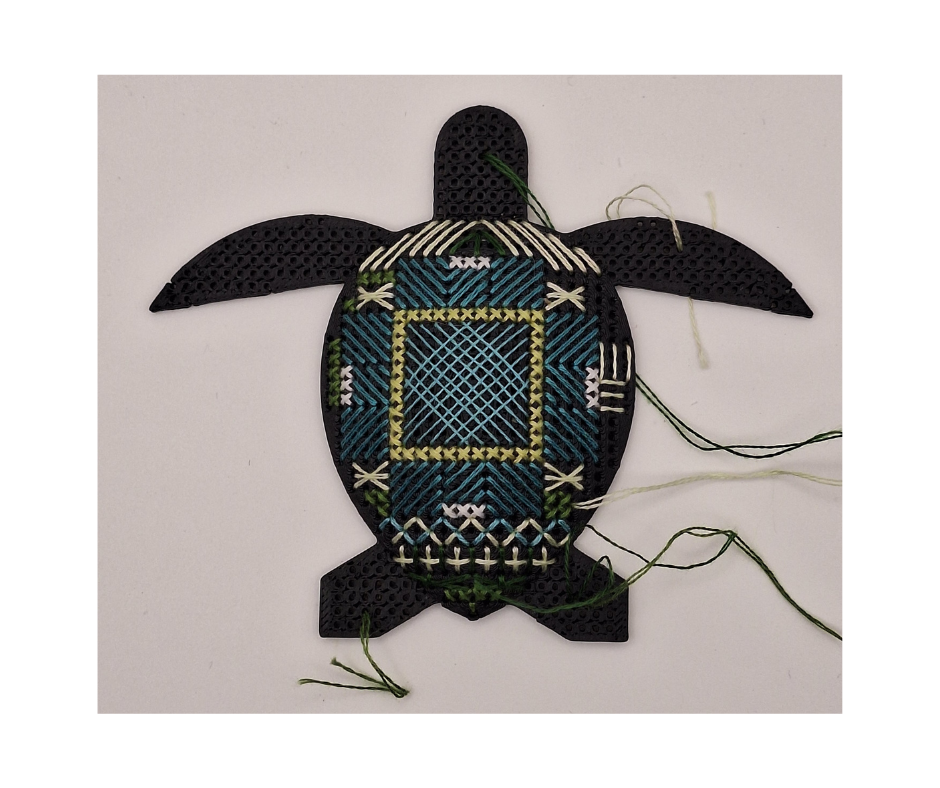
I have stopped working on my 3D turtle project, and have returned to my first love of canvas work (counted work).
I have a 3D printed base with a grid and I am stitching on it. Using a number 9 embroidery needle and two strands of DMC. The motif in the middle is one strand, but I thought two looked better.
Filed under 3D Print, Canvas Work, Cross Stitch, Embroidery